Flashlight Project (CONSTRUCTION)
For this project I decided to repurpose a rope of Christmas that I had laying around and turn them into a functional flashlight. Going into this project, Functionality and affordability where my main two focuses. For my materials I used mainly found items or items that I already had previously.
Materials:
- Lights
- Battery Casing
- AA Batteries
- Wall Putty
- Painters Tape
- Discarded Cardboard
- 1 hair clip
- 1 Command Hook
- Black Paint
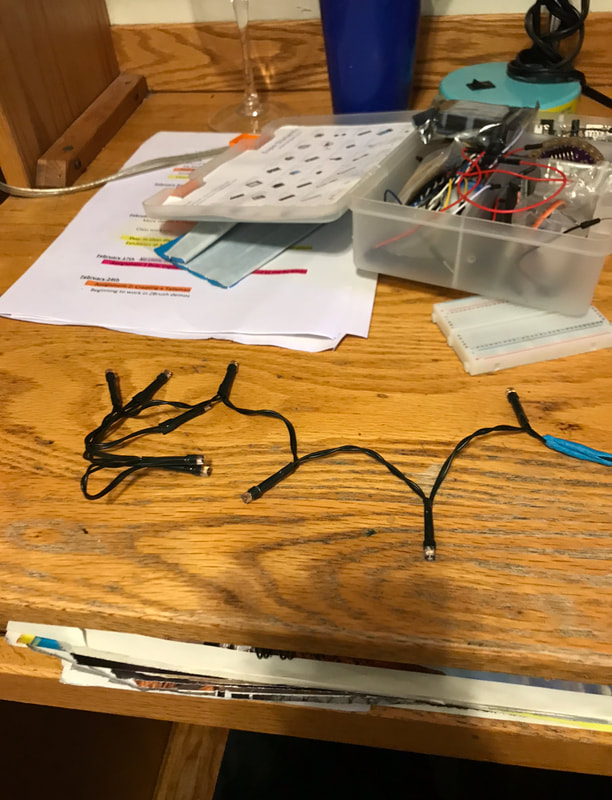
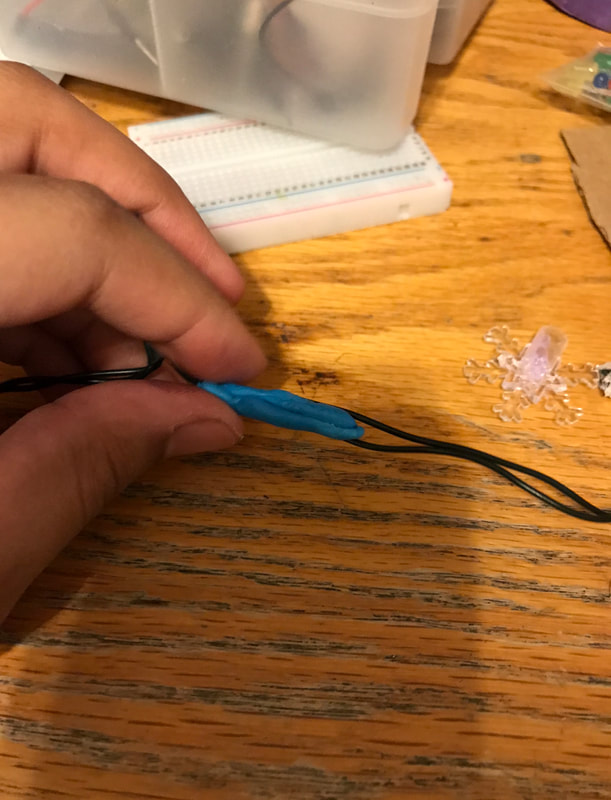
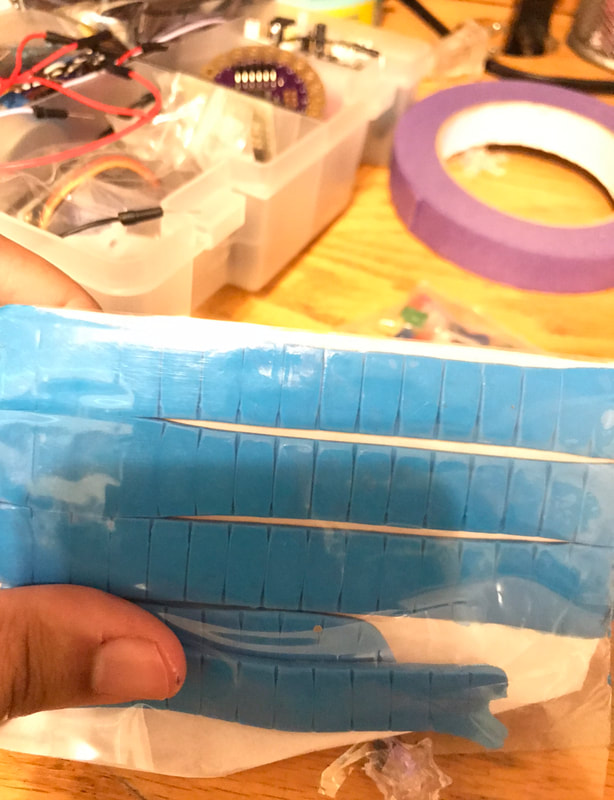
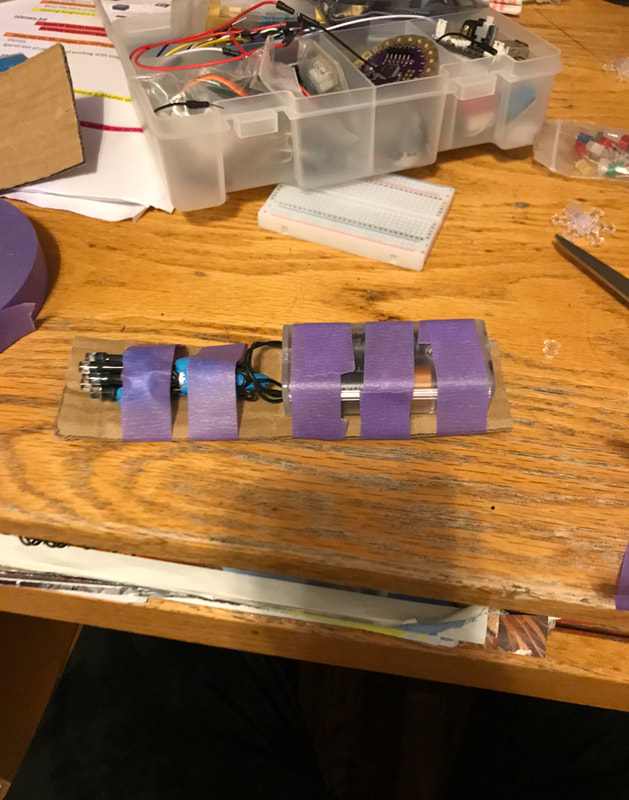
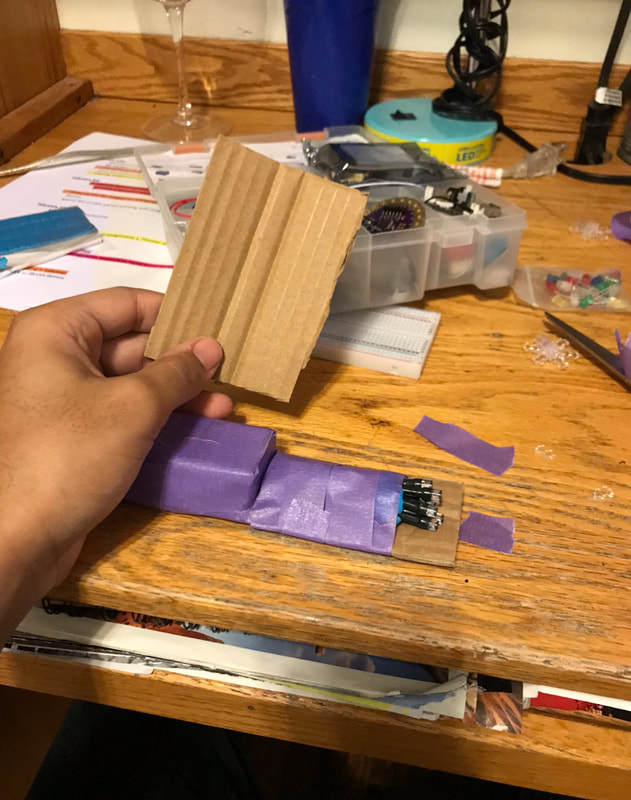
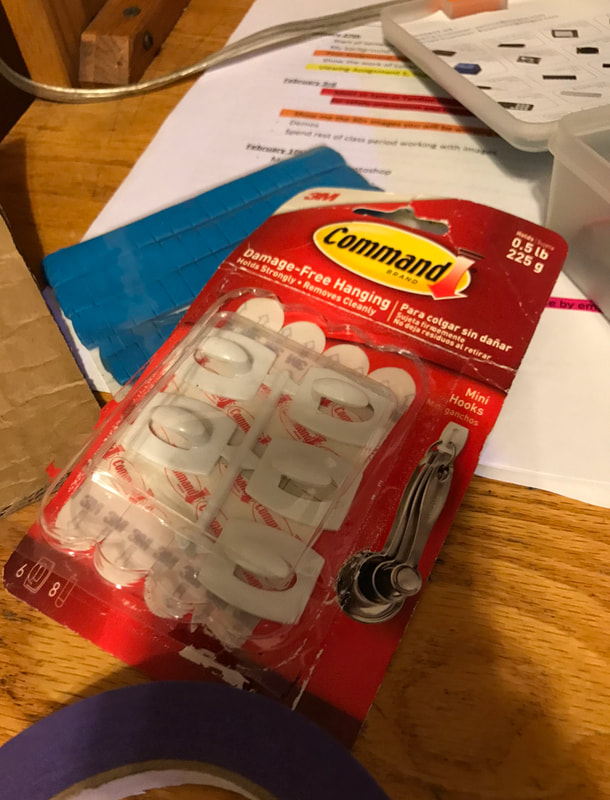
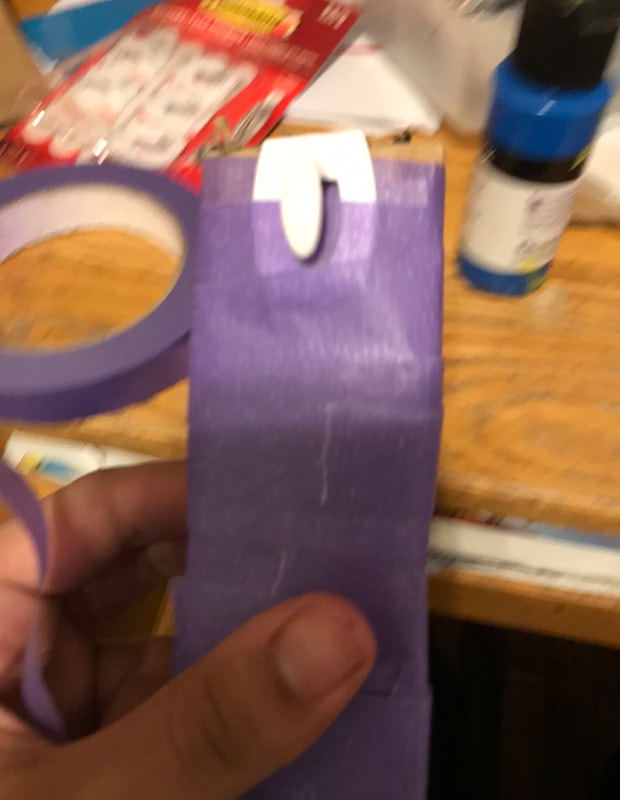
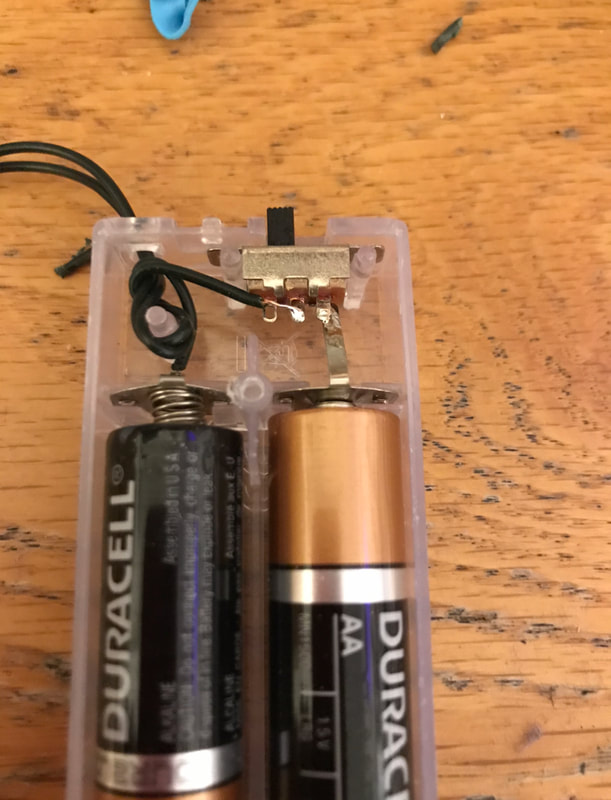
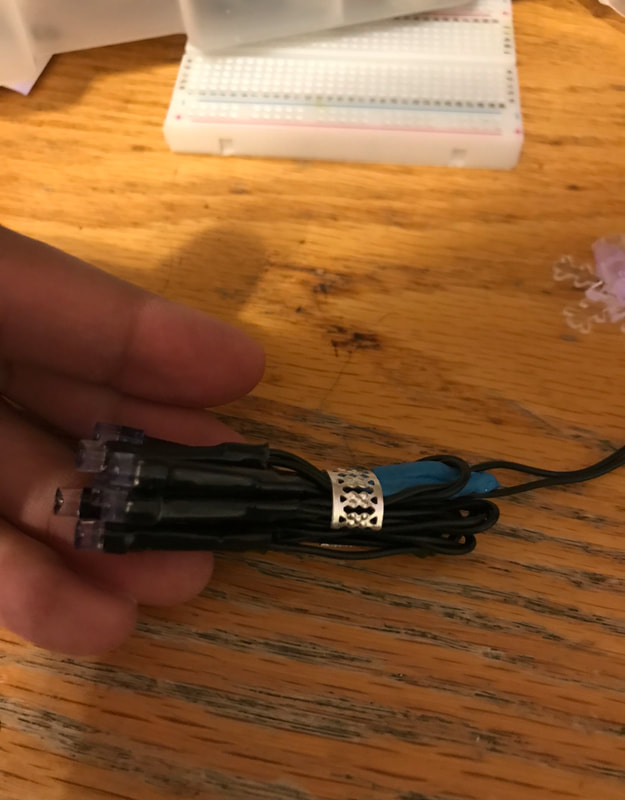
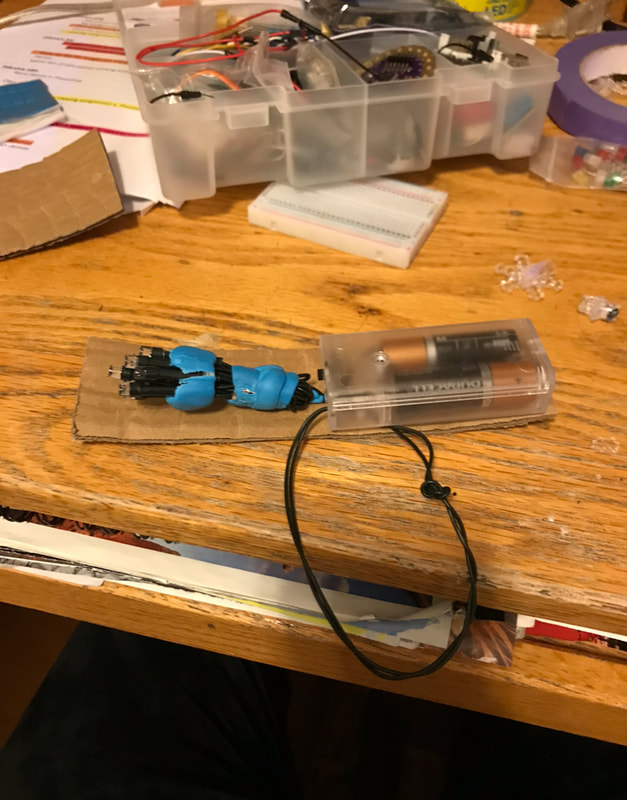
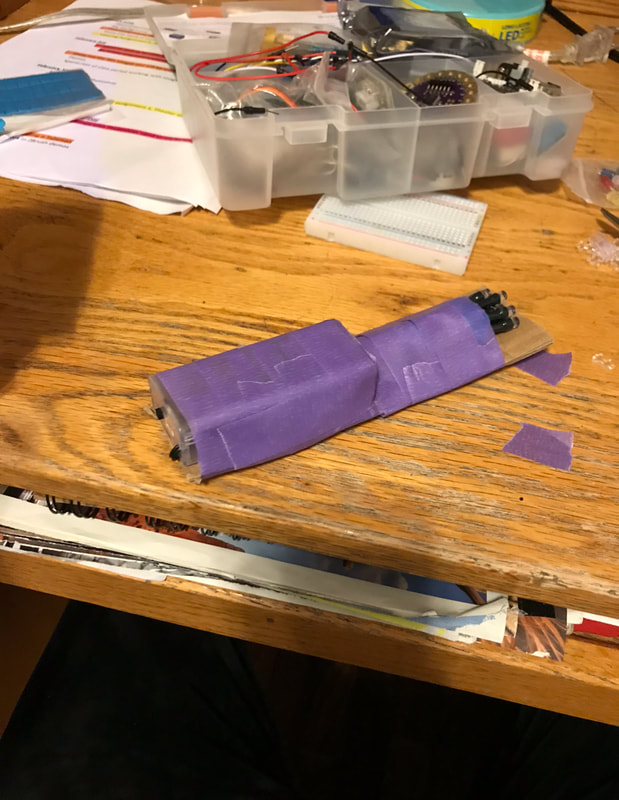
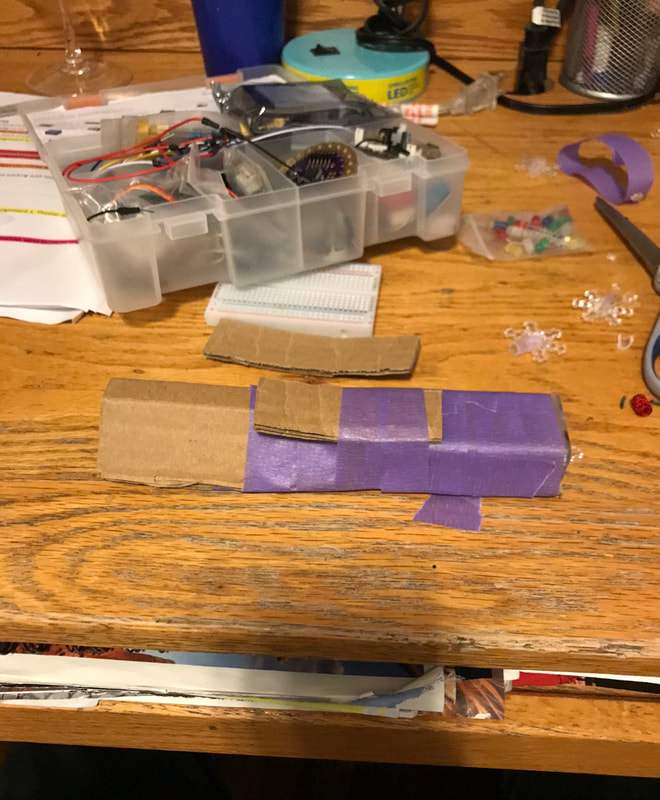
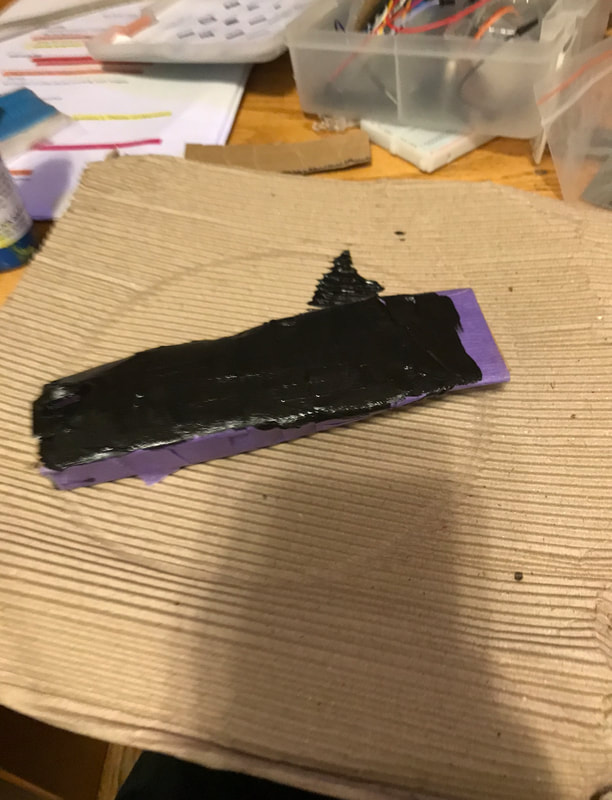
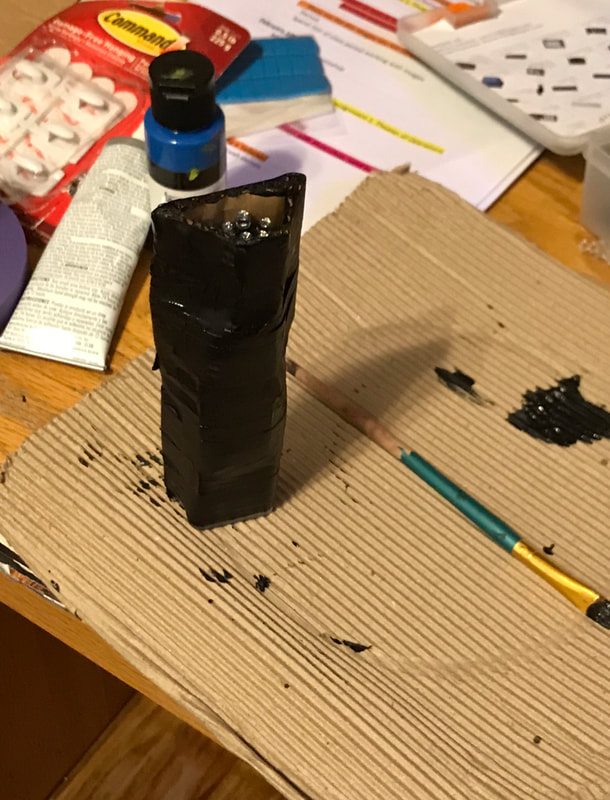
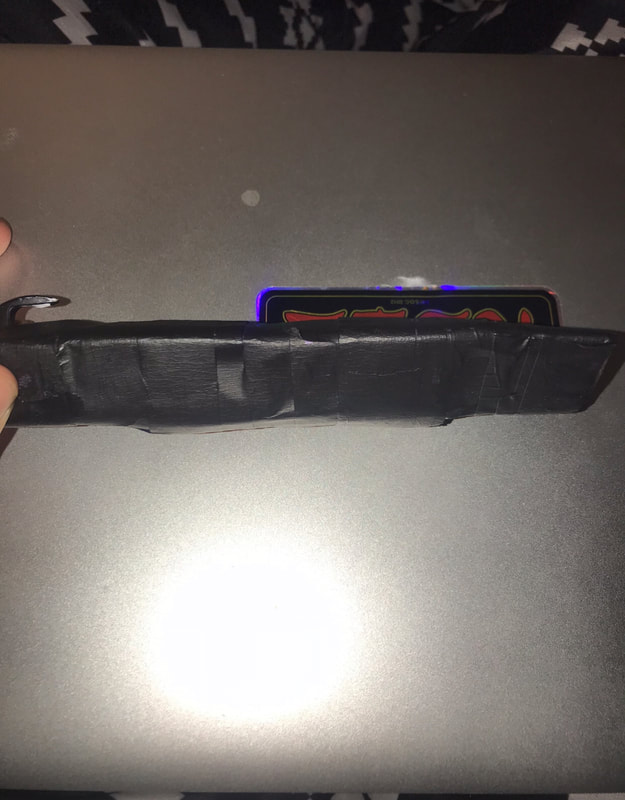
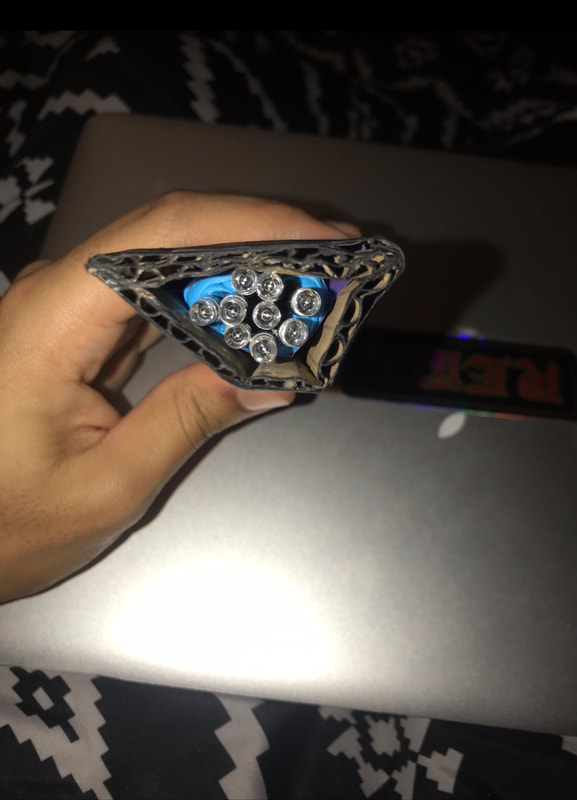
After repairing the Christmas lights by cutting out one of the lights and reconnecting the wire, I began using the putty to connect the lights into a bundle. It took a few layers but when I finally got the lights in the shape that I desired I began to work on the housing. I chose cardboard because it was easy to work with and form but also because I felt that I could layer it in order to achieve my ideal weight. I then formed the cardboard into a shape that I felt would be useful and comfortable to hold and then i began wrapping the housing in painters tape. It was not the strongest tape so I had to wrap it in multiple layers but after a while I was confident that it was sturdy enough I attached a command hook to serve as a pants hook. Finally I painted the whole thing black because I felt that that would make it feel more like a tool than a toy.
Materials:
- Lights
- Battery Casing
- AA Batteries
- Wall Putty
- Painters Tape
- Discarded Cardboard
- 1 hair clip
- 1 Command Hook
- Black Paint
After repairing the Christmas lights by cutting out one of the lights and reconnecting the wire, I began using the putty to connect the lights into a bundle. It took a few layers but when I finally got the lights in the shape that I desired I began to work on the housing. I chose cardboard because it was easy to work with and form but also because I felt that I could layer it in order to achieve my ideal weight. I then formed the cardboard into a shape that I felt would be useful and comfortable to hold and then i began wrapping the housing in painters tape. It was not the strongest tape so I had to wrap it in multiple layers but after a while I was confident that it was sturdy enough I attached a command hook to serve as a pants hook. Finally I painted the whole thing black because I felt that that would make it feel more like a tool than a toy.
|
|
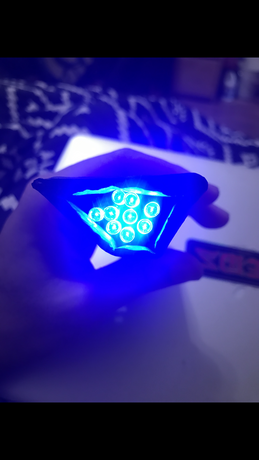
Flashlight Project Final Product
|
|
|
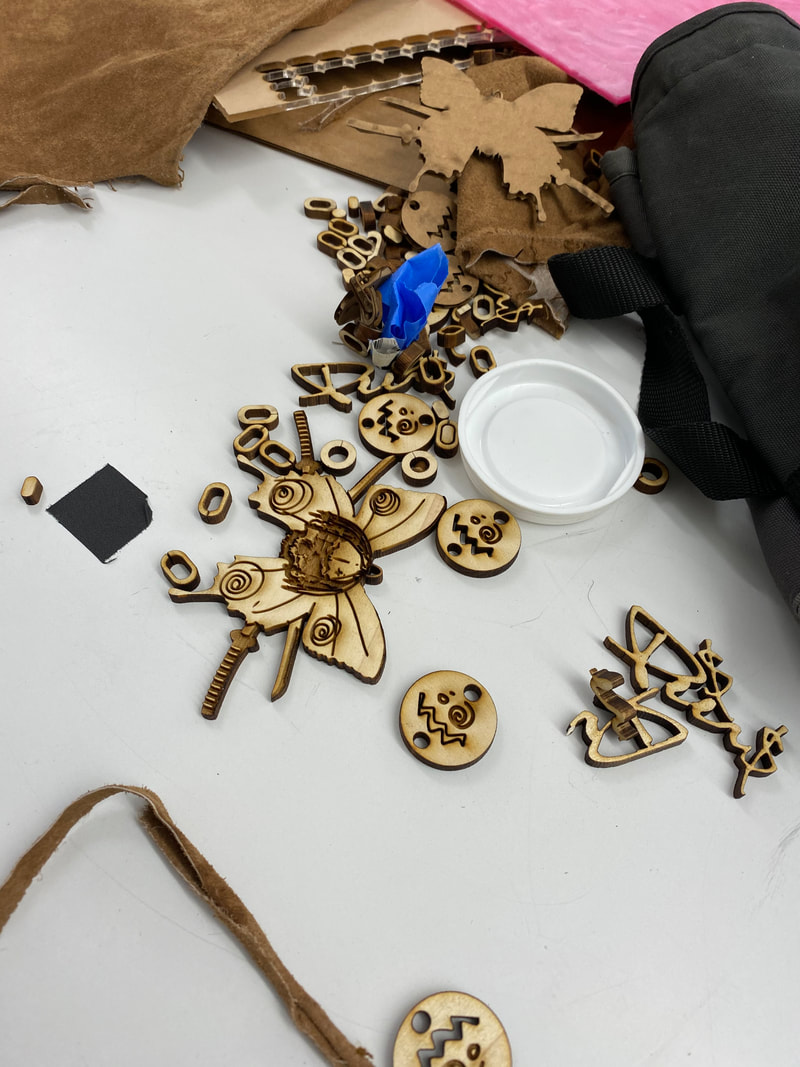
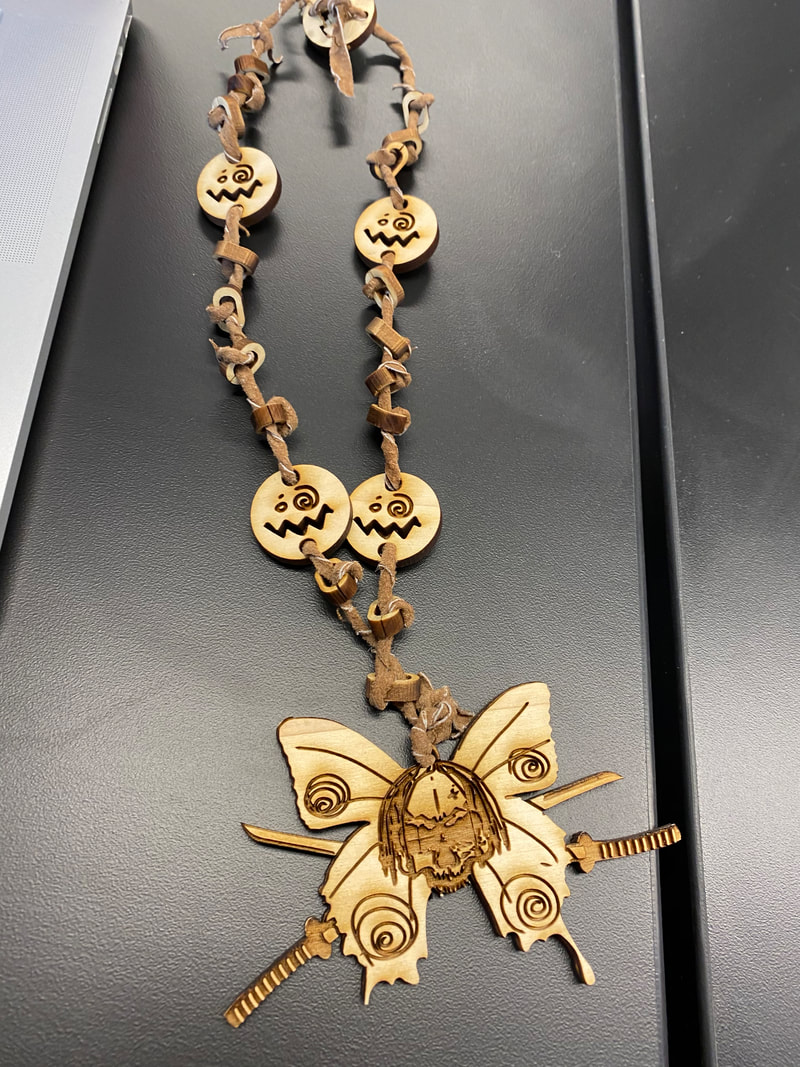
Two Material Project
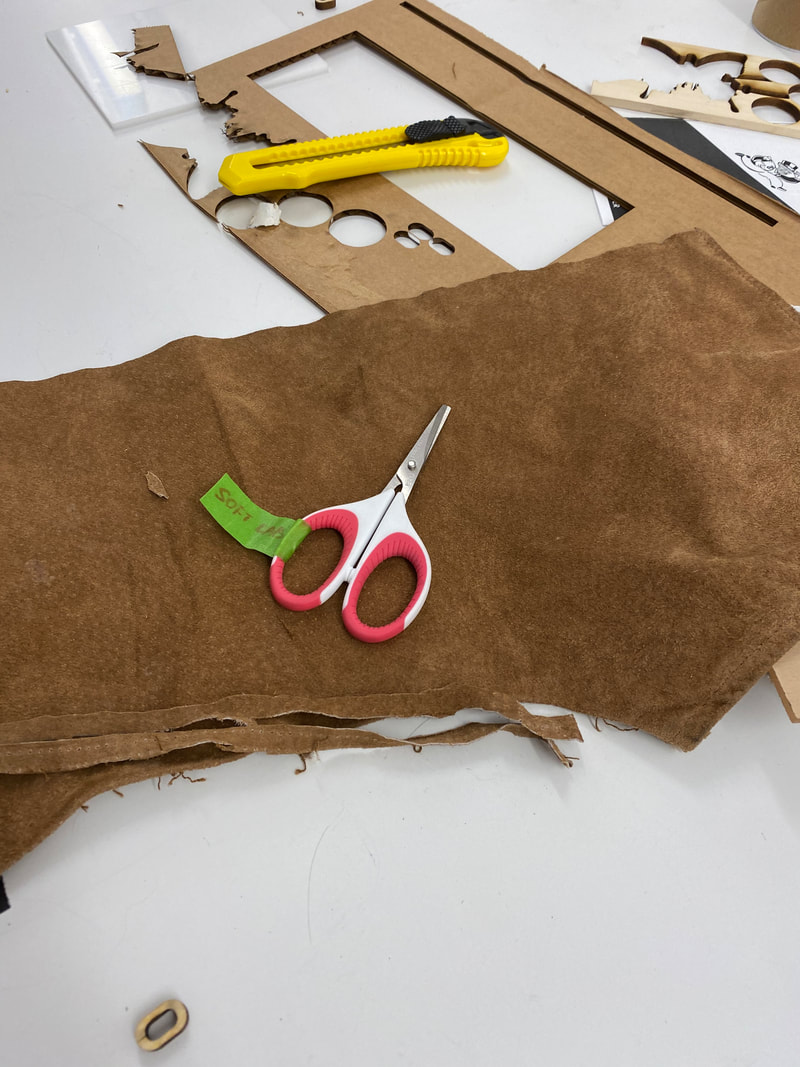
For this project, I used wood and leather as my two materials and as a big part of my concept I really wanted to attach the two mechanically in order to create a necklace that appeared to be very organic and natural looking.
The first thing I did was design my image that I wanted to become the pendant. Im not exactly sure what inspired this piece but after a bit of playing around with this is the design that I decided on.
|
|
|
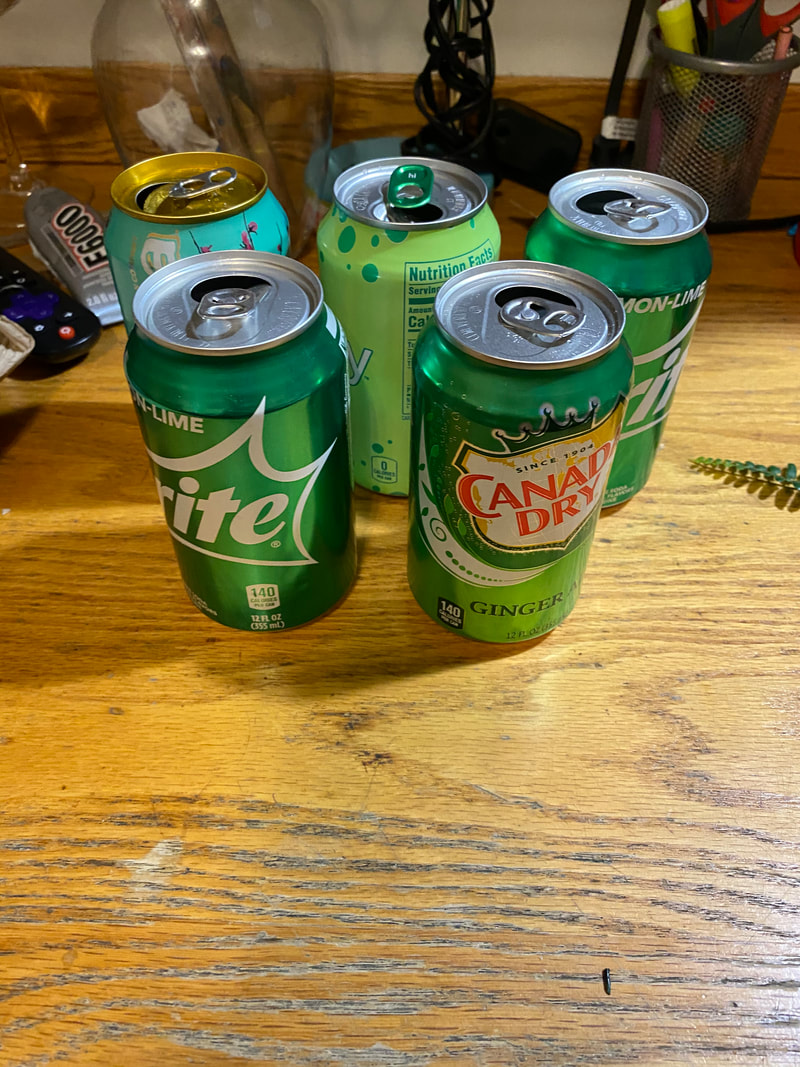
Repetition Project
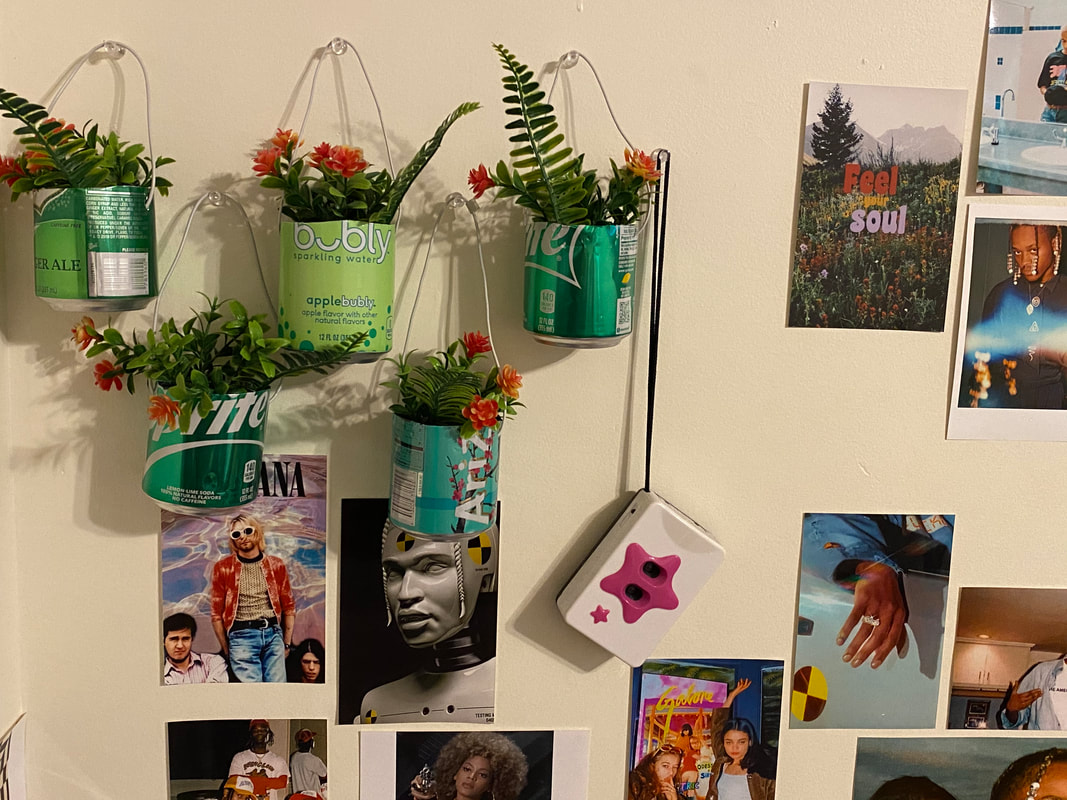
For this project i decided that I wanted to construct my objects out of recycled and found objects in order to create pieces that are more enviromentally friendly that some of the other things I have constructed. The first thing that I did was look around for items in my dorm that I could use. I quickly found that we had a lot of discarded soda cans so I decided that I would use that as the base of my project.
|
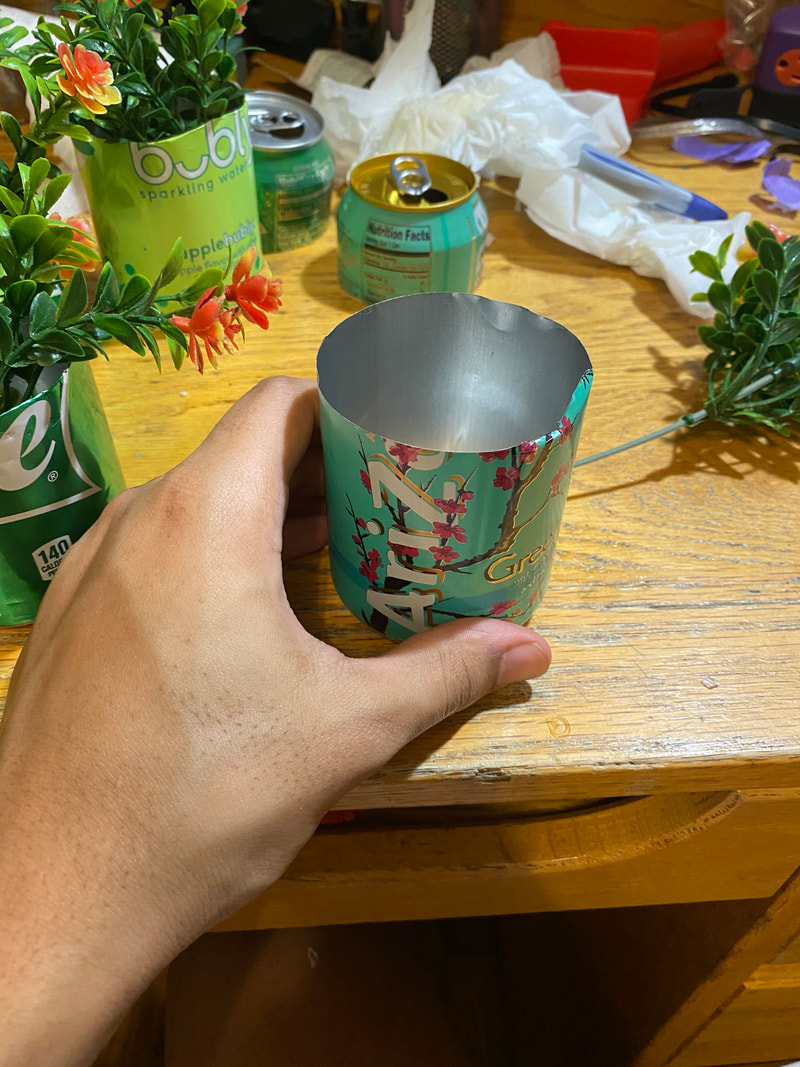
After I decided to use the can I started to think about using them as a container and the green color scheme that all of the cans shared caused me to consider using them as mini recycled planters for small flowers or succulents.
Therefore the next thing that I needed was plants. Originally I was going to use live ones but for the purpose of this project I decided to use fake flowers as a place holder. This is also due to the fact that I had a small bush of artificial flowers laying around my room. |
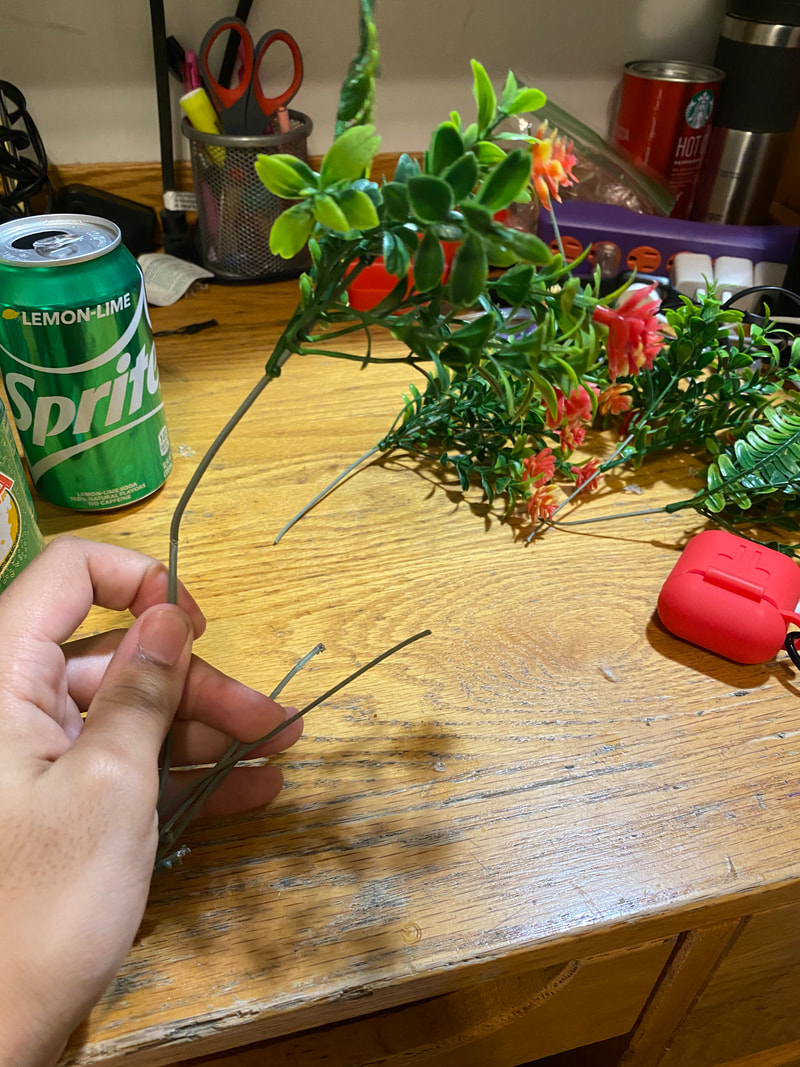
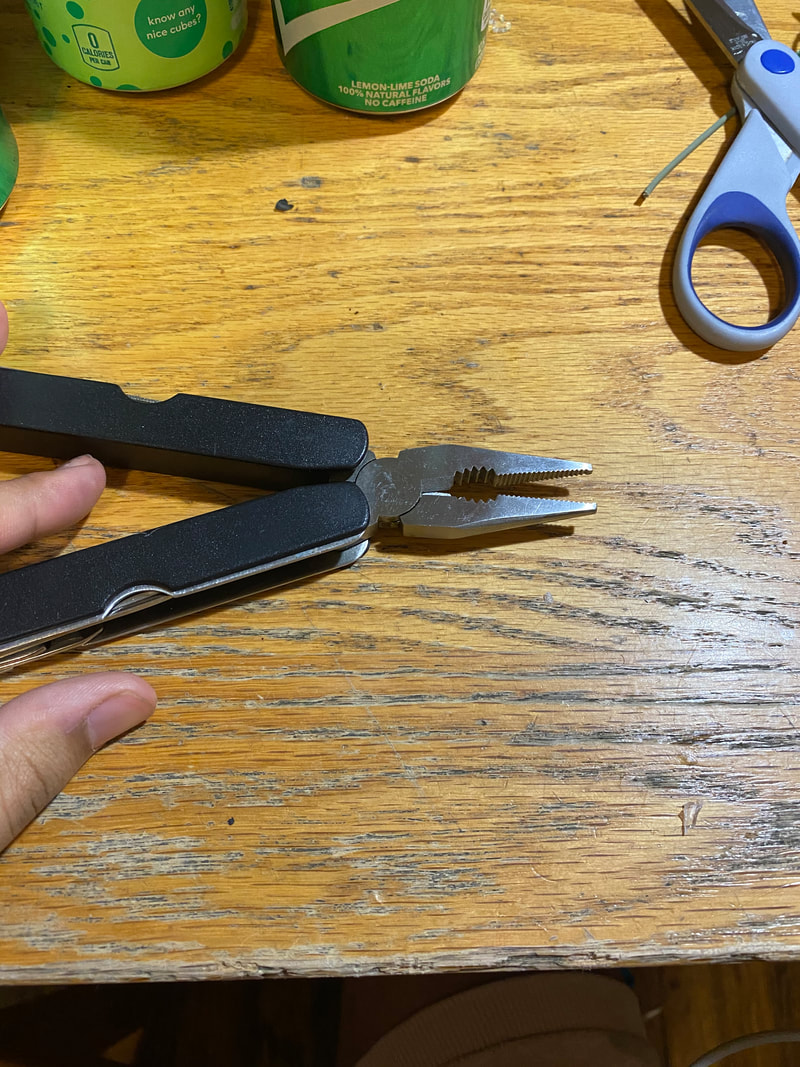
I began to cut the bush into four even bundles of flowers and then I used a knife to cut the cans in half to serve as my container. The cans were now the right size however they had a very sharp and jagged edge so I used a pair of pliers to bend that edge inward.
Now that I had the cans formed into containers I punched holed in the sides of the planters and cut a pair of broken apple headphones to use as a string to hang the planters from.
|
|
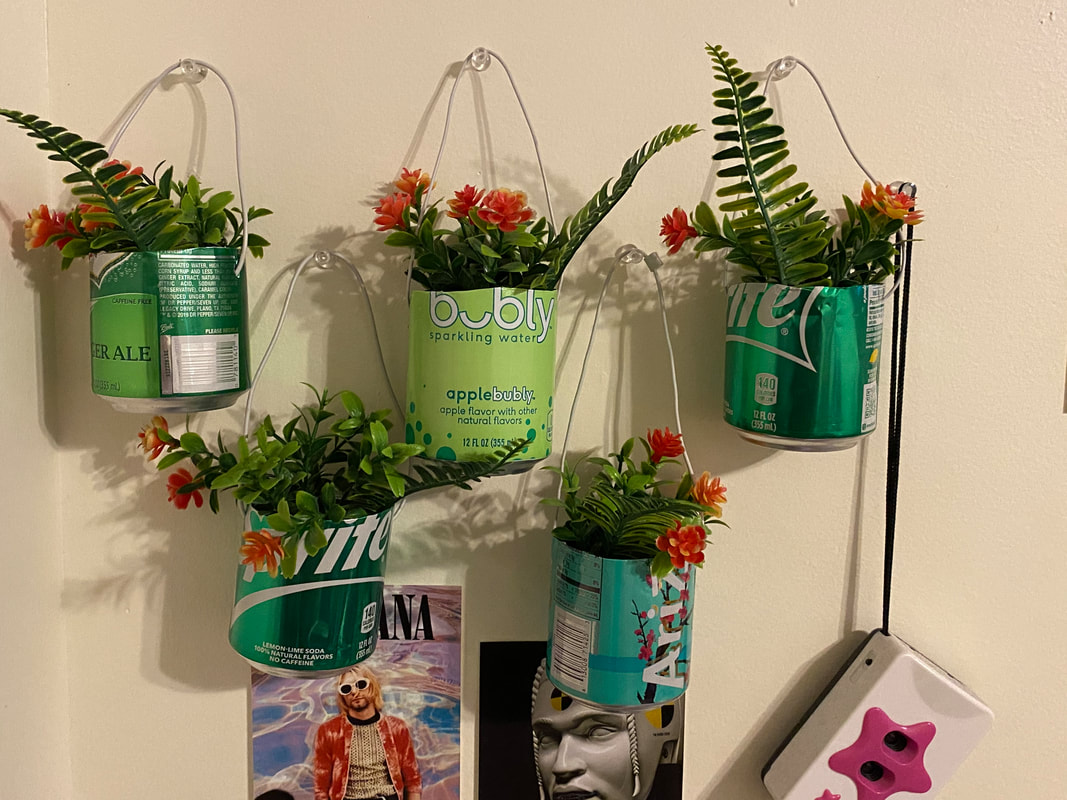
Here is the final product now all I have left to do is to buy some small plants and soil to fill them with and then move them closer to a window.
|
|
laser
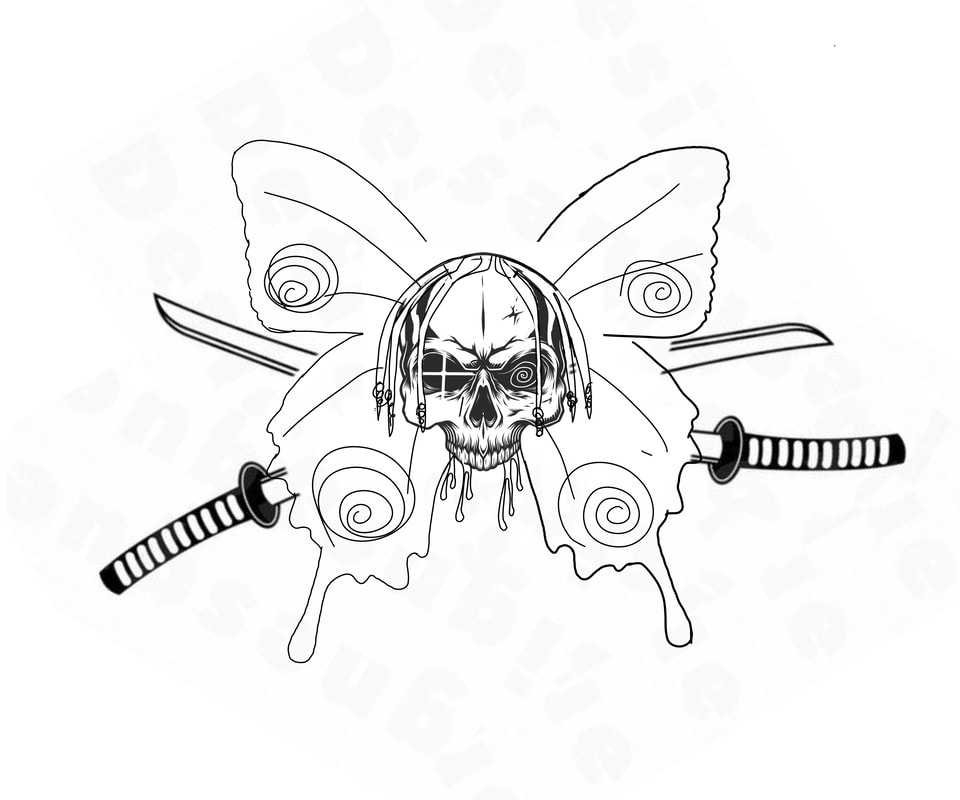
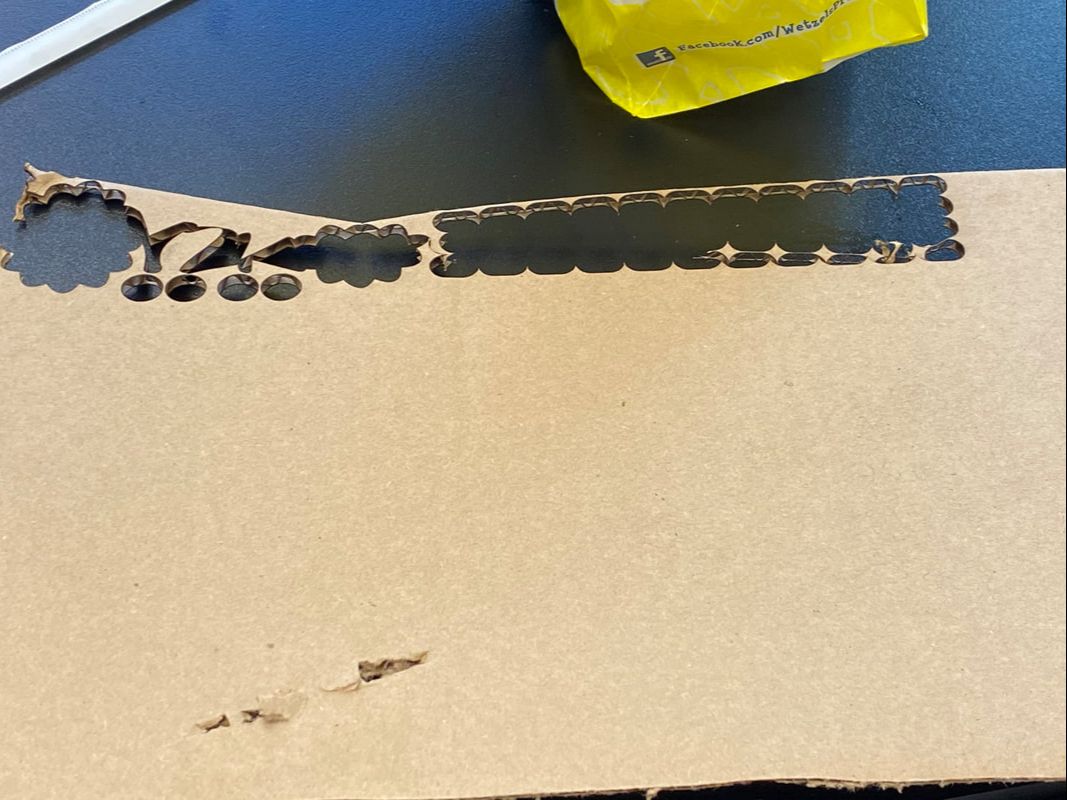
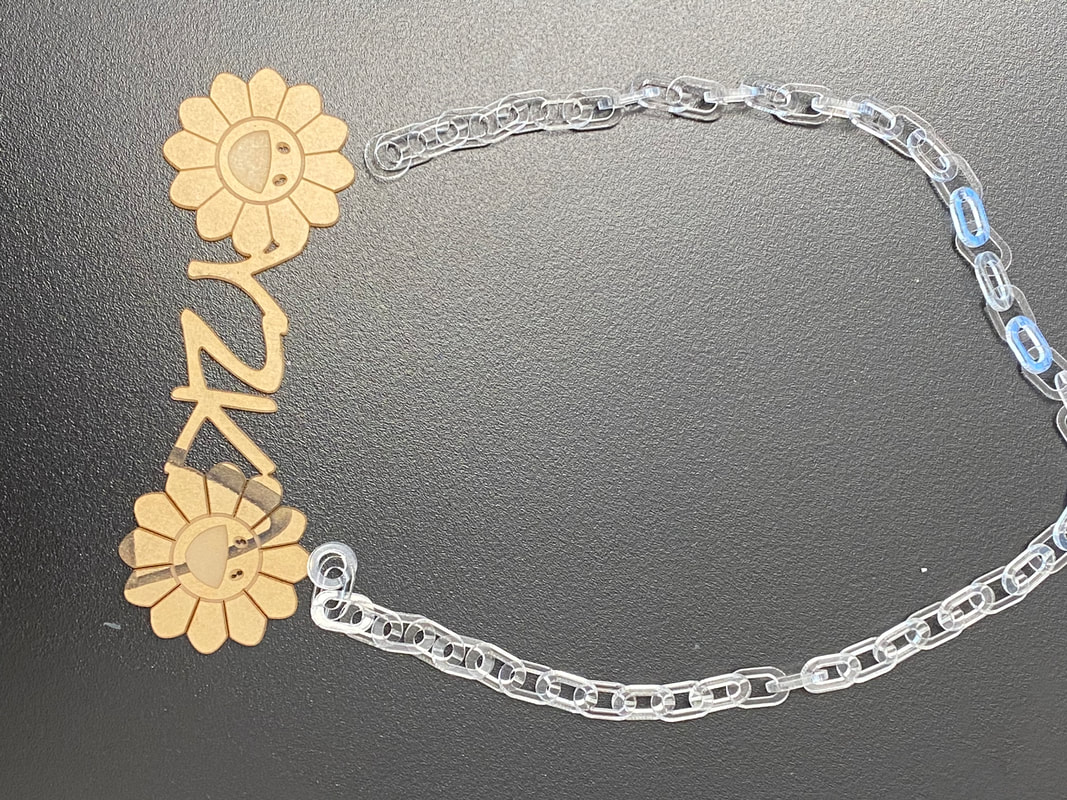
For this project I wanted to attempt to use the laser cutter in order to make some jewelry and through the process I was able to learn a lot about using the laser and using illustrator designing and print custom jewelry. I decided to make this gift for a friend of mine who is very into Murakami which is why two of his trademark flower characters are seen in the pendant that I printed. The text reads Y2K representing the year she was born. A large portion of the work I did on this project was spent trying to understand how to best use illustrator to convert this drawing that I made in Procreate into a usable vector file.

|
|
|
above is the design that I sketched in Procreate along with the cardboard practice run to make sure that my settings in illustrator were right.
|
After I printed the design onto a sheet of clear acrylic I began the long process of connecting all of the plastic links together. Then, due to poor designing on my part I had to use acrylic glue in order to attach the chain onto the necklace. Finally I added a clasp to the chain and the necklace was complete
|
|
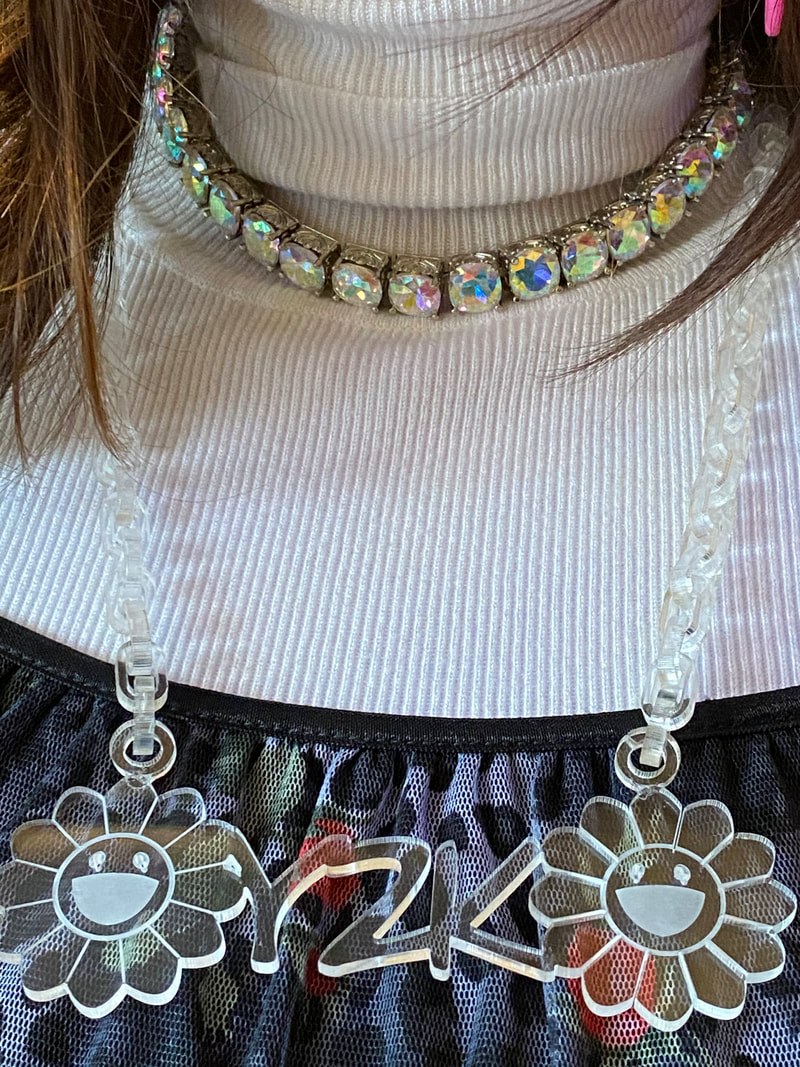
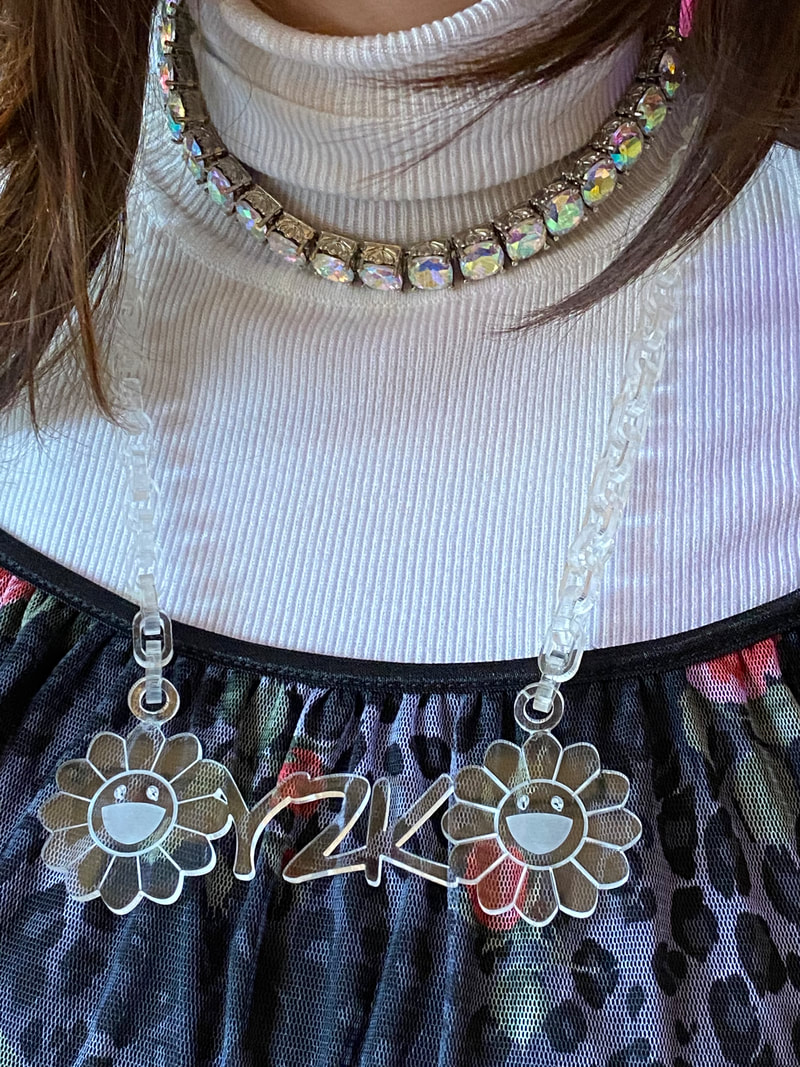
Here are two images of the final product.
|
|
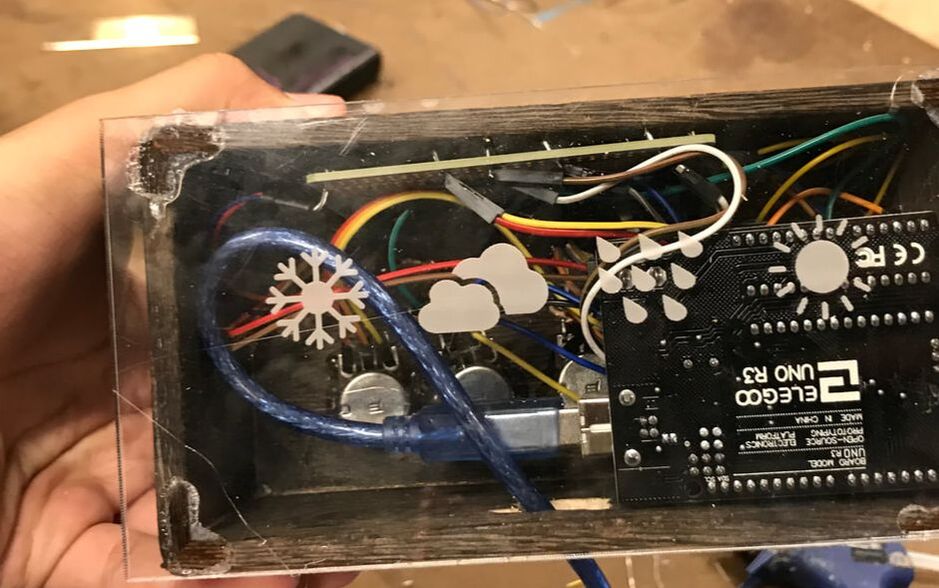
Enclosure.
Unfortunately I do not have very much documentation for this project as it was completed very last minute but I will describe my process of creating an enclosure to hold an Arduino that is wired with three buttons and 5 potentiometers
The construction of this enclosure was pretty easy honestly. I bought one strip of thin wood that I measured and then cut into five pieces. I was worried about wether I would be able to drill and screw together pieces of wood this narrow so instead i combined the pieces by hot glueing them on the inside seam. Then I drilled 8 holes in order to mount all of the buttons and potentiometers ( I also hot glued them all at the bottom as a extra measure because i drilled a few of the holes slightly too large. The final step was stuffing the Arduino in the box and attaching the glass bottom. This is the one part that I regret using hot glue on. Since its a clear material you can clearly see where it is glued which I do not like very much. However I do like the fact that the glass has a slightly larger area than the rest of the piece. I think that the lip that it creates gives the box a bit more character and makes the design less boring.
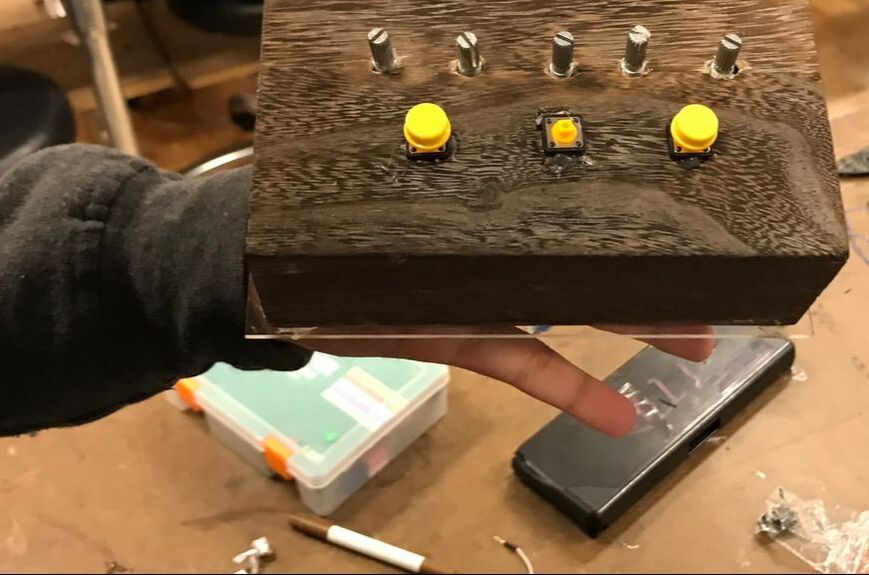
Here's an image of what the final product looks like from the top and bottom
|
|
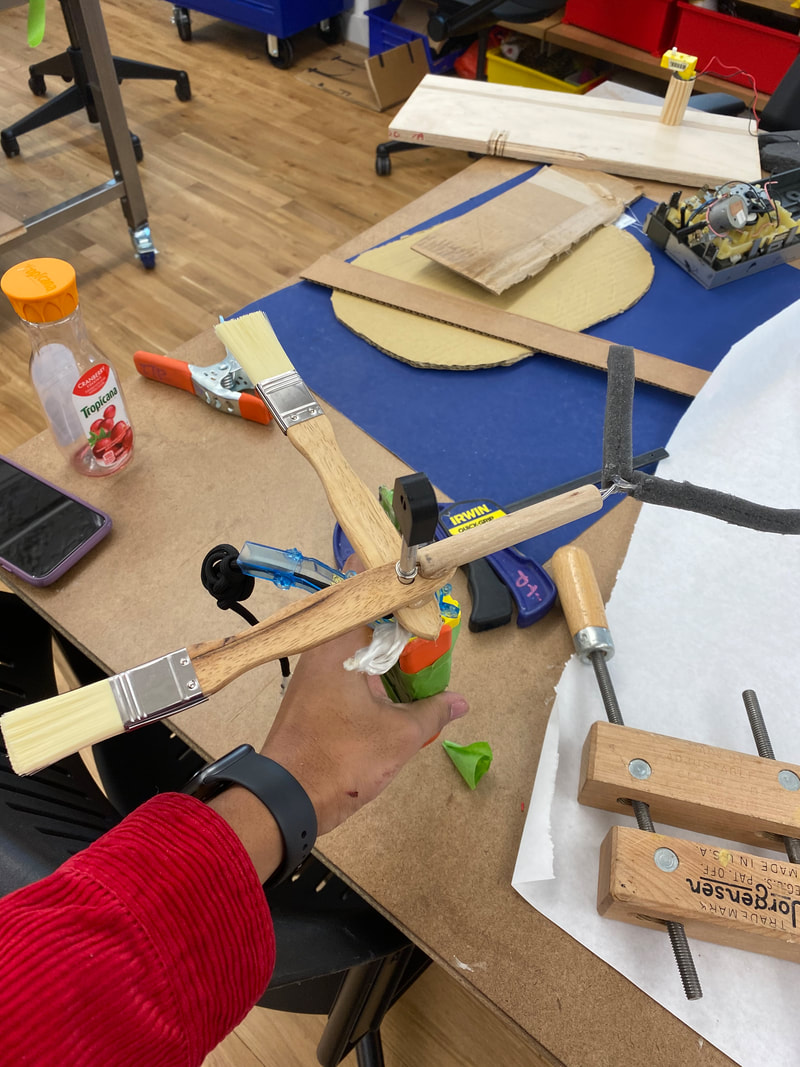
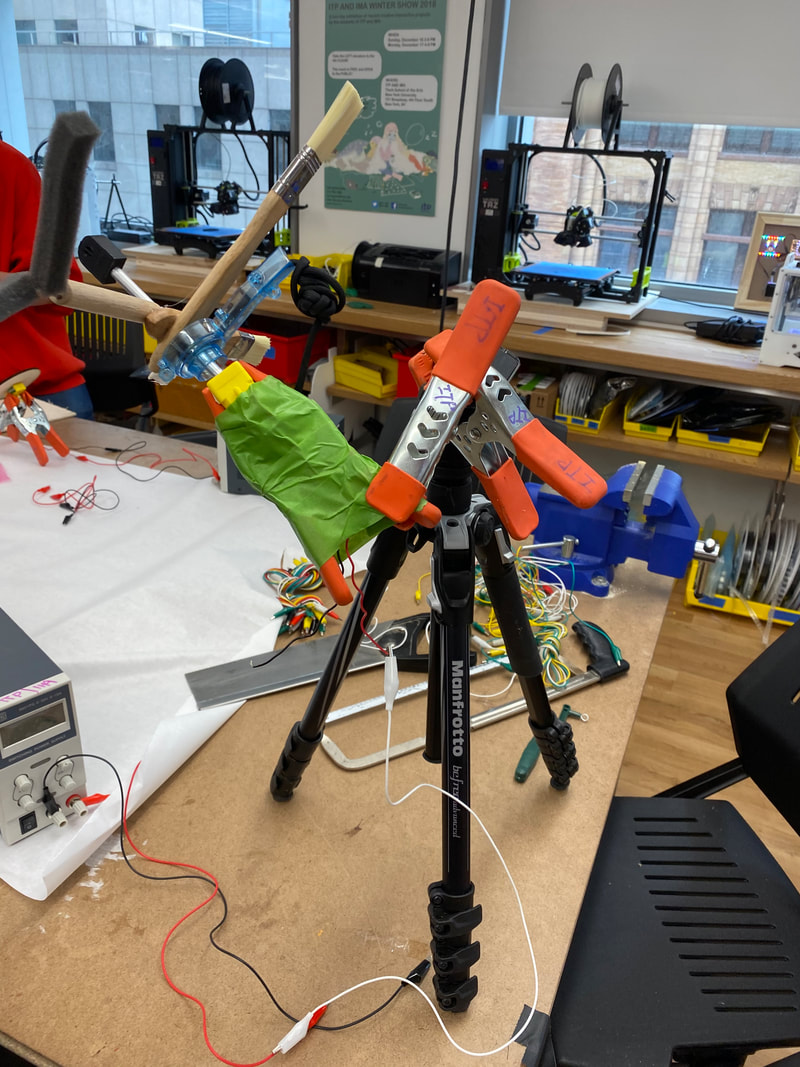
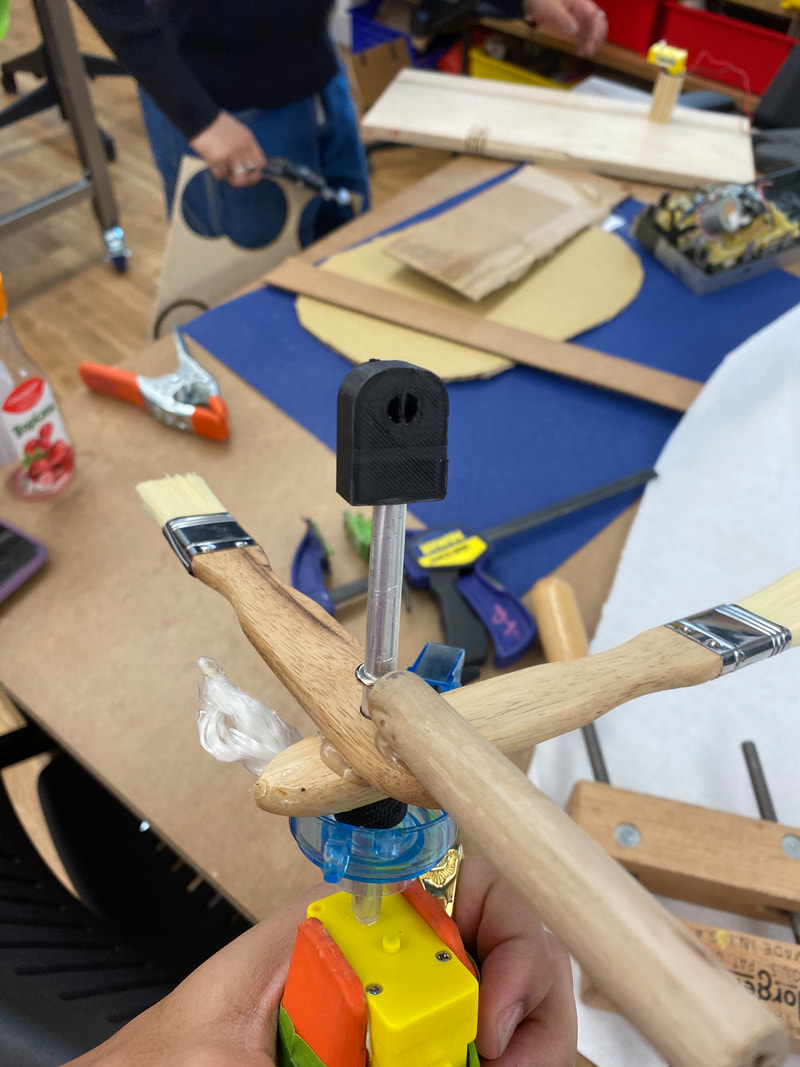
In Class Motor Assignment
in class I made a spinning paintbrush device. I then took that idea further and made a second version of the design which I used to actually paint a piece.
|
|
|
Below is a video of the device and the piece I made with it
